Sunday, April 14, 2013

Swan Paper Folding

What does this box of folded triangles mean? It means I'm going to make a swan! Called swan paper folding or 3-D origami, this is an easy way to make some impressive modular origami.  For this project I followed the directions found here

I personally find it easier to just fold paper when I have spare time (commercial breaks are great for this!) and once the box is full I will make something.


I assembled my pieces


Look at em in a row!


Started joining them together:


Tada! A base!


Keep adding rows:


And more rows:


And lookie! Wings! Word of advice (which I totally didn't follow) work on both wings at once.  Then you have a better chance of making them match up.  I made these one at a time and as you can see, they don't match up at all.


Make the neck:


And attach!

He came out pretty cute even if his wings are a bit lopsided. Hope you like! 

Monday, March 25, 2013

DIY Liquid Soap

So I am a girl on a budget.  So naturally I love saving money and I also love making my own things so DIY liquid soap seemed right up my ally!

Plus, did you know FUN TIMES are ahead when you stick a bar of Ivory soap in the microwave? No really, LOOK!!!


It blows up into this airy cloud of soap! And yes, this lead to WAY more excitement than it should have. I have always heard that it would do this, but was skeptical.  I now may or may not have an extra bar sitting around for days I need a pick me up....maybe. lalalala Moving on!

If you are using something other than Ivory soap, you will need to grate your soap. But, the microwaved Ivory soap is so airy it melts easily (and is fun!)

So add the soap to a pot of warm water and melt away!


I added more water, came back and....well...I now had a pot sized bar o soap. So added more water!


In the end it came out to one gallon water to 1 bar o soap.  It is pretty runny, so next time I think I will use a cup or two less and play around. You can always add more water if too thick.


But as you can see, its a bit, well, lumpy.


So I beat it! (was kinda thankful the boyfriend was not home as he would think I was a tad odd for using the mixer on soap...)

Then tada! You are done! I was able to make a gallon of liquid soap for about $0.25 since I got the bar soap on clearance. Not too shabby! Next time will try a little less water to see if I can get it thicker, but overall I am very happy.

And making more means more soap in the microwave which is SO FUN. ^___^

Monday, March 18, 2013

Pillow Case Attempt #2

So now that I had recovered one of the seats in my chair, the other one was looking downright gross and needed to be covered too!


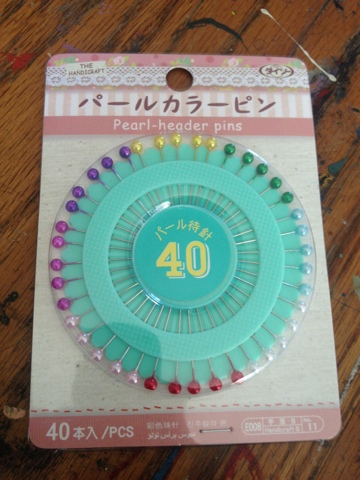
Yay....Nothing like a good old mystery stain to inspire a pillow cover right? So I learned my lesson last time and invested in some very handy sewing tools...pins! Concept right? Like I said...NEVER claimed to be able to sew...


So once again I wrapped the cushion with the fabric and pined the edges. I was also super carful to make sure I put the finished seams on the right side. See? I can learn!


So I sewed it and wrestled with the pillow to go into the case...and it came out...full of fail.  So the odd shape of the cushion totally surpassed my sewing ability. You can see the corners are a bit wonky.

BUT when put back on the chair it is not too terrible! It isn't great, but it is good enough to share a room with a somewhat destructive 4 year old boy. Someday I will stain the chair to match the rest of the dark wood in my place, but that is a project for another day!

Sunday, March 10, 2013

Felt Shamrock pin

I love my grandma.  She is who gave me the crafting gene.  I love her because she is a total enabler.  She tells me she found "a little" felt and wanted to know if I wanted it.

Here is "a little" felt. Oh the projects I will have to make!


With St. Patty's Day coming up I pulled out some green

Now what to make? I was inspired by this pin I found on Pinterest. I started with cutting strips then cutting little pieces with my pattern.


I then string them together...


Cinch up the string and TADA shamrock!


Popped it on a pin

Cute and tiny!

And it was lonely so I made it some friends


But I had more felt. Much more felt. SOOOOOO layers!


I like this one even more. I think this is the one I will wear on St. Patty's. mwhahahaha no one can pinch me now!

Monday, March 4, 2013

Pillowcase Attempt #1

So the fact I have to put making a pillowcase as an "attempt" should really call out to my lack of sewing skills. This is the most involved sewing project of my life! Usually I just attempt to hem my pants (a required life skill for the uber short)

So, why would I make a pillowcase on my own if my sewing skills are so abysmal?

Well this is what happens when you have an older chair in a room with a four year old. The cover starts to rip.  Then is helped along with little hands.  Then those little hands discover how fun picking apart foam is.....


Luckily I had a random flat sheet from Ikea sitting around. Think at some point I was going to make curtains with these.  You know, five years ago....


First I wrapped up the pillow case and cut off the excess fabric.  It was kinda like wrapping a present, yay! Something I'm good at!


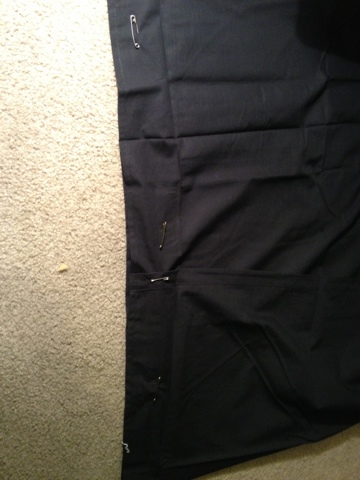
Then I pinned the edges.  Again, you can see I don't sew since I don't own sewing pins. Sooooo safety pins it was!


Then the other side...(notice how I made the pretty hem on the top. So when I turned it inside out it would make the inside pretty? Yeah....lack of planning....)


Then I sewed it! Turned it inside out, and fought with the foam to get the stupid thing back into the pillowcase. But! I won! woohoo!

The lovely inside hem that should have been on the inside but like I said...lack of planning.....


Is it beautiful? nope. Even? nope. Does it kinda actually resemble a pillowcase? YES! Will it prevent little child from picking apart foam? Maybe....lol 


All in all not a total complete fail! I actually got to use my sewing machine! (yes, I have a really nice sewing machine for no good reason. Maybe I thought buying it would somehow create sewing ability....if you look above...yeah not so much lol)

Monday, February 25, 2013

Polymer Clay Elephant Pendant

So one of my boyfriend's friends got a big promotion and he wanted me to make him an elephant pendant as a gift.  In Filipino culture, an elephant with an upturned trunk is a sign of good luck (according to the boyfriend, don't quote me on this one!) 

I used Sculpey Premo! Accents polymer clay in grey granite for this pendant.  First I conditioned the clay.  This can take a while with this color as the granite effect clays seem to be a bit stiffer than solid colors. 

Once I was done conditioning the clay I used a chunk and made it into a rectangle that was a bit under a half an inch thick.  I then made a dent in the top to start forming the head.


I then took my blade and cut into one end of the rectangle.  I then started working this part to lengthen and shape it to look like a trunk.


I then cut out a notch in the bottom of the rectangle to form the legs.  Its starting to look like an elephant now!


I kept smoothing with my fingers to make the edges rounded and to make the trunk and legs the shape I wanted.  I then used one of my tools to make the eyes and ears.  A toothpick would work great for this too.


Once I was happy with how the little guy looked I baked him per the directions on the package.  Once he was baked and cooled I added a bail to the back of him and put him on a simple cord.  I didn't get a picture of the finished product as of course the boyfriend needed it same day.  What is it with men and last minute things? lol 

If you haven't tried polymer clay you should! The best part is it doesn't air dry so you have plenty of time to play around and if  you mess up you can just start over again and again. 

Sunday, November 25, 2012

Cinnamon Ornaments

I saw some cute cinnamon ornaments on Pinterest and so I started poking around the web to find more recipe.  I found this great one at McCormick.  What I liked about it is that it is just cinnamon and applesauce.  That's it!   Totally safe for pets and kids who may wanna gnaw on your ornaments =P

Here is all I need!


I mixed them together and made a dough. It smelled SO GOOD


Then I rolled them out to about a quarter inch in thickness and cut them out with little cookie cutters.  I used a small straw to make the holes in the top.  I baked them for about an hour at 200.  My whole place smelled so good! They should be rock hard when they are done.  After they cool I'm going to use some simple cotton twine as hangers.  


My tree will smell extra yummy this year.  They will also make really cute gift tags =)